Thursday, April 21, 2016

Creating and Registering a Plugin for OIM Using JDeveloper

This post is inspired by:
http://deepakdubeyontech.blogspot.com/2014/05/oim-11g-r2-ps2-notify-user-id-to-user.html

In this post, step-by-step instructions are given on how to create a custom component so that it can be registered to OIM 11gR2 PS2 or PS3.

Start JDeveloper

Select Java EE Edition and click OK


Click New Application


Take the defaults and click Next


Give it a name, say Client2 and click Next


Give your default package a name such as com.test.event.oim.user.NotifyUserIdToUser and click Finish


Click click the green '+' icon and Create in Project and then Java Class


Name your class e.g. NotifyUserIdToUser and click OK


Your screen should look like this:


Copy and paste this code into your new class:

package com.test.event.oim.user;

import static oracle.iam.identity.usermgmt.api.UserManagerConstants.AttributeName.MANAGER_KEY;
import static oracle.iam.identity.usermgmt.api.UserManagerConstants.AttributeName.USER_LOGIN;

import java.io.Serializable;
import java.util.ArrayList;
import java.util.HashMap;
import java.util.HashSet;
import java.util.List;
import java.util.Set;

import oracle.iam.identity.exception.NoSuchUserException;
import oracle.iam.identity.exception.UserLookupException;
import oracle.iam.identity.usermgmt.api.UserManager;
import oracle.iam.identity.usermgmt.vo.User;
import oracle.iam.notification.api.NotificationService;
import oracle.iam.notification.vo.NotificationEvent;
import oracle.iam.platform.Platform;
import oracle.iam.platform.authz.exception.AccessDeniedException;
import oracle.iam.platform.kernel.spi.PostProcessHandler;
import oracle.iam.platform.kernel.vo.AbstractGenericOrchestration;
import oracle.iam.platform.kernel.vo.BulkEventResult;
import oracle.iam.platform.kernel.vo.BulkOrchestration;
import oracle.iam.platform.kernel.vo.EventResult;
import oracle.iam.platform.kernel.vo.Orchestration;

import java.util.logging.Logger;

public class NotifyUserIdToUser implements PostProcessHandler {

        private static final Logger log = Logger.getLogger( NotifyUserIdToUser.class.getName() );
        public EventResult execute(long processId, long eventId,
                Orchestration orchestration) {
                return new EventResult();
        }


        private NotificationEvent createNotificationEvent(String poTemplateName,
                        String userKey) {
                NotificationEvent event = null;
                try {
                        event = new NotificationEvent();
                        String[] receiverUserIds = getRecipientUserIds(userKey);
                        event.setUserIds(receiverUserIds);
                        event.setTemplateName(poTemplateName);
                        event.setSender(null);
                        HashMap<String, Object> templateParams = new HashMap<String, Object>();
                        templateParams.put("usr_key", userKey);
                        event.setParams(templateParams);
                        log.info("Template Name " + poTemplateName);
                } catch (Exception e) {
                        e.printStackTrace();
                        System.out.println("e-------->" + e.getMessage());
                }
                return event;
        }

        @Override
        public void initialize(HashMap<String, String> arg0) {
        }

        @Override
        public boolean cancel(long arg0, long arg1,
                        AbstractGenericOrchestration arg2) {
                return false;
        }

        @Override
        public void compensate(long arg0, long arg1,
                        AbstractGenericOrchestration arg2) {

        }

        @Override
        public BulkEventResult execute(long l, long l1, BulkOrchestration bulkOrch) {
                try {
                        System.out.println("Entering  BulkEventResult of NotifyUserIDToUser");
                        System.out.println("l ->" + l);
                        System.out.println("l1 ->" + l1);
                        String oprType = bulkOrch.getOperation();
                        System.out.println("oprType ->" + oprType);
                        HashMap<String, Serializable>[] bulkParams = bulkOrch
                                        .getBulkParameters();
                        for (HashMap<String, Serializable> bulkParam : bulkParams) {
                                System.out.println("bulkParam ->" + bulkParam);
                                Set<String> bulkKeySet = bulkParam.keySet();
                                System.out.println("bulkKeySet ->" + bulkKeySet);
                                String usrLogin = null;
                                String usrKey = null;
                                for (String key : bulkKeySet) {
                                        System.out.println("key ->" + key);
                                        Serializable serializable = bulkParam.get(key);
                                        System.out.println("serializable ->" + serializable);
                                        if (key.equalsIgnoreCase("User Login")) {
                                                usrLogin = serializable.toString();
                                                System.out.println("usrLogin ->" + usrLogin);
                                                UserManager usrMgr = Platform
                                                                .getService(UserManager.class);

                                                User user = usrMgr.getDetails(usrLogin, null, true);
                                                usrKey = user.getEntityId(); // getAttribute("usr_key").toString();
                                                String uid = user.getId();
                                                System.out.println("uid--->" + uid);
                                                System.out.println("usrKey ->" + usrKey);
                                                String templateName = "Notify UserId to User";
                                                NotificationService notService = Platform
                                                                .getService(NotificationService.class);
                                                NotificationEvent eventToSend = this
                                                                .createNotificationEvent(templateName, usrKey);
                                                notService.notify(eventToSend);

                                        }

                                }
                        }
                } catch (Exception e) {
                        System.out.println("exception e in BulkExecuteEvent ->"
                                        + e.getMessage());
                        e.printStackTrace();
                }
                System.out.println("Exiting  BulkEventResult of NotifyUserIDToUser");
                return new BulkEventResult();
        }

        private String[] getRecipientUserIds(String userKey)
                        throws NoSuchUserException, UserLookupException,
                        AccessDeniedException {
                UserManager usrMgr = Platform.getService(UserManager.class);
                User user = null;
                String userId = null;
                Set<String> userRetAttrs = new HashSet<String>();
                userRetAttrs.add(MANAGER_KEY.getId());
                userRetAttrs.add(USER_LOGIN.getId());
                User manager = null;
                String managerId = null;
                String managerKey = null;
                Set<String> managerRetAttrs = new HashSet<String>();
                managerRetAttrs.add(USER_LOGIN.getId());
                user = usrMgr.getDetails(userKey, userRetAttrs, false);
                userId = user.getAttribute(USER_LOGIN.getId()).toString();
                List<String> userIds = new ArrayList<String>();
                userIds.add(userId);
                if (user.getAttribute(MANAGER_KEY.getId()) != null) {
                        managerKey = user.getAttribute(MANAGER_KEY.getId()).toString();
                        manager = usrMgr.getDetails(managerKey, managerRetAttrs, false);
                        managerId = manager.getAttribute(USER_LOGIN.getId()).toString();
                        userIds.add(managerId);
                }
                String[] recipientIDs = userIds.toArray(new String[0]);
                return recipientIDs;
        }

 }

Your JDeveloper screen should look like this:


Notice the red bars on the right which indicate missing jar files.  Try and compile the program selecting Build -> Make Client2.jpr


The compiler log pane will display errors as shown below:


To fix these, we need to modify the class path so that the relevant libraries and jar files can be included.  To do this, in the Application Navigator, right click on Client and from the pop-up menu, select Project Properties:


From the Project Properties menu, select Libraries and Classpath:


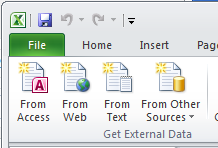
Click on the Add JAR/Directory:


Most of the required jars will be in your $IDM_HOME/server which in this case is $IDM_HOME=/app/fmw/Oracle_IDM1/server.  In the Add Archive or Directory pop up, enter /app/fmw/Oracle_IDM1/server/client/oimclient.jar and click Select.  See below:


The following will be displayed:


Repeat the above for the following jar files:
$IDM_HOME/server/platform/iam-platform-kernel.jar
$IDM_HOME/server/platform/iam-platform-context.jar

Your Project Properties -> Libraries and Classpath should look like this:


Click Build -> Rebuild Client2.jpr (or whatever your project is called).  You should get a clean build with no errors:


Source and class files will be located here:

/home/oracle/Application2/Client2/classes
/home/oracle/Application2/Client2/src

Next, we are ready to create the jar file and use Ant to register the plugin to OIM.

Set your ant and OIM environment variable and place your ant variable in the path:
# e.g. IDM_HOME=/app/fmw/Oracle_IDM1
OIM_ORACLE_HOME=$IDM_HOME
ANT_HOME=$MW_HOME/modules/org.apache.ant_17.1
export PATH=$PATH:$ANT_HOME/bin
export ORACLE_OIM_HOME

Create a plugins directory, say /home/oracle/oim_plugins

cd /home/oracle/oim_plugins
mkdir -p stage/custom/lib

Copy class files from /home/oracle/Application2/Client2/classes to /home/oracle/oim_plugins/stage/lib as follows:

cd /home/oracle/oim_plugins/stage/custom/lib
cp -rfp /home/oracle/Application2/Client2/classes .

Create a plugin.xml file:

<?xml version="1.0" encoding="UTF-8"?>
<oimplugins>
  <plugins pluginpoint="oracle.iam.platform.kernel.spi.EventHandler">
      <plugin pluginclass=
              "com.test.event.oim.user.NotifyUserIDToUser"
               version="1.0"
               name="NotifyUserIDToUser">
      </plugin>
  </plugins>
</oimplugins>


Next, create a zip archive:

zip -r NotifyUser.zip lib plugin.xml

You are now ready for registering your custom component into OIM.

cd $IDM_HOME/server/plugin_utility

Register the plugin:

ant -f pluginregistration.xml register

Buildfile: pluginregistration.xml

register:
     [echo] 
     [echo] *******************************************************************************
     [echo]             REGISTRATION TOOL TO REGISTER
     [echo] *******************************************************************************
     [echo] This tool can be used to register or unregister plugins to OIM.
     [echo] 
...

...
...
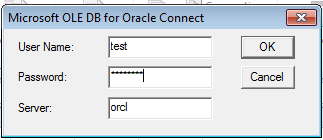
    [input] Enter the oim user id: 
xelsysadm
    [input]Enter the oim user password:  

    [input] Enter the server url [WLS : t3://<host>:<port> WAS : corbaloc:iiop:<host>:<port> )]: 
t3://localhost:14000
    [input] Enter name (complete file name with path) of the plugin file: 
/home/oracle/oim_plugins_ins/stage/custom/NotifyUser.zip

-register-to-was-server:

-register-to-wls-server:

...
...
...
BUILD SUCCESSFUL
Total time: 1 minute 37 seconds


Check for errors in the output.  If there are no error, your plugin should now be registered and ready for use.

Wednesday, April 13, 2016

Installing APEX 5.0.3 and RESTful Services on Oracle 11gR2 and Oracle Enterprise Linux

Introduction

This is a high-level overview of installing APEX 5.0.3 on Oracle 11gR2 and Weblogic 10.3.6.  These instructions are distilled from Oracle installation guide:
https://docs.oracle.com/cd/E59726_01/install.50/e39144/toc.htm

Middleware is located here: /app/fmw
Weblogic domain is: /app/fmw/user_projects/domains/WLSDomain
Domain name is: WLSDomain

APEX will be installed here: /app/apex


Downloading Files

Download APEX from here:
http://www.oracle.com/technetwork/developer-tools/apex/downloads/index.html

I selected:
Oracle Application Express 5.0.3 - English language only

Download REST data services from here:
http://www.oracle.com/technetwork/developer-tools/rest-data-services/downloads/index.html

Oracle REST Data Services 3.0.4

Installing APEX

Unzip the APEX download file:
cd /app
unzip ~/Downloads/apex_5.0.3_en.zip

cd /app/apex

Start SQL*Plus and login as SYSDBA

Install the full development environment
@apexins.sql SYSAUX SYSAUX TEMP /i/

Thank you for installing Oracle Application Express 5.0.3.00.03

Oracle Application Express is installed in the APEX_050000 schema.

The structure of the link to the Application Express administration services is as follows:
http://host:port/pls/apex/apex_admin (Oracle HTTP Server with mod_plsql)
http://host:port/apex/apex_admin     (Oracle XML DB HTTP listener with the embedded PL/SQL gateway)
http://host:port/apex/apex_admin     (Oracle REST Data Services)

The structure of the link to the Application Express development interface is as follows:
http://host:port/pls/apex (Oracle HTTP Server with mod_plsql)
http://host:port/apex     (Oracle XML DB HTTP listener with the embedded PL/SQL gateway)
http://host:port/apex     (Oracle REST Data Services)


PL/SQL procedure successfully completed.

Install Oracle REST Data Services

mkdir /app/ords
cd ords
unzip ~/Downloads/ords.3.0.4.60.12.48.zip

mkdir /app/ords/restdata

cd /app/ords
$ java -jar ords.war
This Oracle REST Data Services instance has not yet been configured.
Please complete the following prompts

Enter the location to store configuration data:/app/ords/restdata
Enter the name of the database server [localhost]:
Enter the database listen port [1521]:
Enter 1 to specify the database service name, or 2 to specify the database SID [1]:orcl
Invalid value. Try again.
Enter 1 to specify the database service name, or 2 to specify the database SID [1]:1
Enter the database service name:orcl
Enter the database password for ORDS_PUBLIC_USER:
Confirm password:

Please login with SYSDBA privileges to verify Oracle REST Data Services schema. Installation may be required.


Enter the username with SYSDBA privileges to verify the installation [SYS]:
Enter the database password for SYS:
Confirm password:
Apr 08, 2016 12:53:12 PM oracle.dbtools.rt.config.setup.SchemaSetup addSchemaParams
INFO: 
Oracle REST Data Services schema does not exist and will be created. 


Enter 1 if you want to use PL/SQL Gateway or 2 to skip this step.
If using Oracle Application Express or migrating from mod_plsql then you must enter 1 [1]:1
Enter the database password for APEX_PUBLIC_USER:
Confirm password:
Enter 1 to specify passwords for Application Express RESTful Services database users (APEX_LISTENER, APEX_REST_PUBLIC_USER) or 2 to skip this step [1]:
Enter the database password for APEX_LISTENER:
Confirm password:
Enter the database password for APEX_REST_PUBLIC_USER:
Confirm password:
Apr 08, 2016 12:55:47 PM oracle.dbtools.common.config.file.ConfigurationFilesBase update
INFO: Updated configurations: defaults, apex, apex_pu, apex_al, apex_rt
Apr 08, 2016 12:55:47 PM oracle.dbtools.installer.Installer installORDS
INFO: 
Installing Oracle REST Data Services version 3.0.4.60.12.48
... Log file written to /app/ords/logs/ordsinstall_2016-04-08_125547_00660.log
... Verified database prerequisites
... Created Oracle REST Data Services schema
... Created Oracle REST Data Services proxy user
... Granted privileges to Oracle REST Data Services
... Created Oracle REST Data Services database objects
Apr 08, 2016 12:56:02 PM oracle.dbtools.installer.Installer installORDS
INFO: Completed installation for Oracle REST Data Services version 3.0.4.60.12.48. Elapsed time: 00:00:15.228 

Enter 1 if you wish to start in standalone mode or 2 to exit [1]:2

Deploying to Oracle Weblogic Server

java -jar ords.war static /app/apex/images
WAR Generation complete
 WAR location     : /app/ords/i.war
 Context path     : /i
 Static resources : /app/apex/images
Ensure the static resources are available at path: /app/apex/images
on the server where the WAR is deployed

Login to Weblogic server
Select Deployments
Click Install
Path: /app/ords/ords.war
Click Next
Install this deployment as an application and click Next
For Available targets for ords : select AdminServer and click Next
Name: ords
Security: Custom Roles: Use roles that are defined in the Administration Console; use policies that are defined in the deployment descriptor
Source accessibility - Select: Use the defaults defined by the deployment's targets
Click Next
Select Yes, take me to the deployment's configuration
Click Finish
Click Save

Now deploy the i.war file
Repeat above steps for i.war

Configuring WebLogic to Handle HTTP Basic Challenges Correctly


vi /app/fmw/user_projects/domains/WLSDomain/config/config.xml

add the following:

...
...
<enforce-valid-basic-auth-credentials>false</enforce-valid-basic-auth-credentials>
</security-configuration>

Save the updated config.xml file, and restart WebLogic if it is running

Verifying the State and Health of apex and i
In the Summary of Deployments, select the Control tab and verify that both the apex/ords and i State are Active and the Health status is OK

If apex or i are not Active, then enable them. In the Deployments table, select the check box adjacent to apex and/or i. Click Start and select Servicing all requests to make them active.

Add ADMIN Account

Start SQL*Plus as sysdba

cd /app/apex
SQL> @apxchpwd.sql
========================================================================
This script can be used to change the password of an Application Express
instance administrator. If the user does not yet exist, a user record will be
created.
========================================================================
Enter the administrator's username [ADMIN] 
User "ADMIN" exists.
Enter ADMIN's email [ADMIN] admin@localhost
Enter ADMIN's password [] Welcome1!
Changed password of instance administrator ADMIN.

Configure RESTful Services
sqlplus '/ as sysdba'
SQL> apex_rest_config.sql

Enter a password for the APEX_LISTENER user              [] 
Enter a password for the APEX_REST_PUBLIC_USER user              [] 
...create APEX_LISTENER user

PL/SQL procedure successfully completed.


Session altered.


PL/SQL procedure successfully completed.

SQL> 

Granting Connect Privileges Prior to Oracle Database 12c


DECLARE
  ACL_PATH  VARCHAR2(4000);
BEGIN
  -- Look for the ACL currently assigned to '*' and give APEX_050000
  -- the "connect" privilege if APEX_050000 does not have the privilege yet.

  SELECT ACL INTO ACL_PATH FROM DBA_NETWORK_ACLS
   WHERE HOST = '*' AND LOWER_PORT IS NULL AND UPPER_PORT IS NULL;

  IF DBMS_NETWORK_ACL_ADMIN.CHECK_PRIVILEGE(ACL_PATH, 'APEX_050000',
     'connect') IS NULL THEN
      DBMS_NETWORK_ACL_ADMIN.ADD_PRIVILEGE(ACL_PATH,
     'APEX_050000', TRUE, 'connect');
  END IF;

EXCEPTION
  -- When no ACL has been assigned to '*'.
  WHEN NO_DATA_FOUND THEN
  DBMS_NETWORK_ACL_ADMIN.CREATE_ACL('power_users.xml',
    'ACL that lets power users to connect to everywhere',
    'APEX_050000', TRUE, 'connect');
  DBMS_NETWORK_ACL_ADMIN.ASSIGN_ACL('power_users.xml','*');
END;
/
COMMIT;

Connect to APEX Sign In Page as Admin

http://localhost:7001/ords/apex_admin

Friday, April 1, 2016

Configure Excel 2010 for Oracle

Problem - Data stored in an Oracle database needs to be accessed in Excel.  First step is to install Oracle software and configure.

In this case, database is Oracle 11gR2 on OEL.  From oracle.com/downloads, download the correct version of the Oracle client software (32-bit or 64-bit).

Install on your client machine.

Using netca.bat (located in $ORACLE_HOME/bin on your client machine), create a Net Service name to connect to the database e.g. orcl.

Do a quick tnsping to make sure that connectivity is available:
tnsping orcl

Used TNSNAMES adapter to resolve the alias
Attempting to contact (DESCRIPTION = (ADDRESS_LIST = (ADDRESS = (PROTOCOL = TCP)
(HOST = 192.168.111.28)(PORT = 1521))) (CONNECT_DATA = (SERVICE_NAME = orcl)))
OK (110 msec)

Make sure that port 22 is not blocked on your database server.

Excel Configuration
Ok, now the Excel config part.


  • Open Excel 2010 and in a blank workbook, click the Data ribbon.

  • Then click the From Other Sources button.
  • From the list, select From Data Connection Wizard
  • Select Oracle Provider for OLE DB and click Next.
  • In Data Source enter the TNS Names alias configured earlier e.g. orcl.
  • Supply a valid user name and password and click Test Connection.  If the test does not succeed, you will need to troubleshoot the error.
  • In the Select Database and Table, select the table/view and click Next.
  • Click Finish.

  • Click OK to import your data into the current sheet.

  • When prompted for a password, enter your credentials and press OK.

  • Data should now appear in your spreadsheet.